How To Hatch Quail Eggs
(Disclosure: Some of the links below are affiliate links, meaning, at no additional cost to you, I will earn a small commission if you click through and make a purchase. I only ever provide links to products I use myself and love.)
Are Quail Eggs Easy to Hatch?
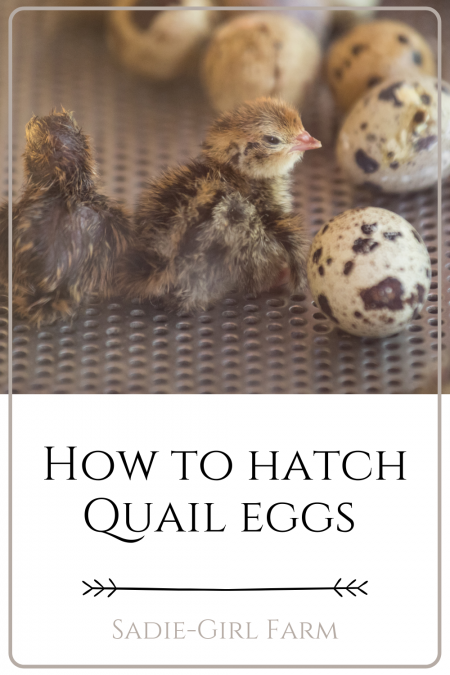
It is so rewarding to watch the “miracle of life” unfold in your own home, by hatching some quail eggs. It is not hard to do, though hatching does take practice and you can get better hatch rates the more you do it, like any new skill. I am going to let you know our tried and true techniques that have served us very well over the years and allowed us to hatch out hundreds of quail each month successfully on our little homestead. You don’t need much, and it only takes a little over 2 weeks for quail to go from egg, to adorable fluffy chick. If you have been thinking of hatching some eggs, I encourage you to take that step and try it out. It is not so intimidating as it may seem!
WHAT KIND OF QUAIL SHOULD i RAISE?
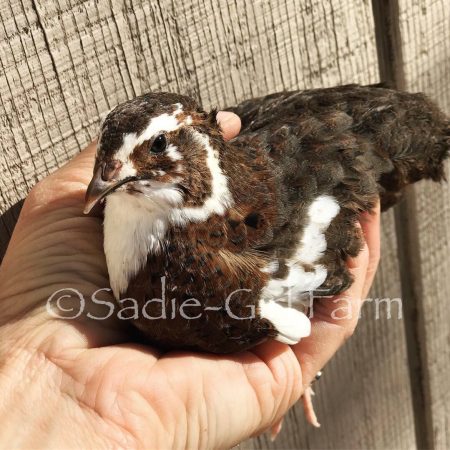
We always recommend Coturnix Quail for beginning quail keepers. These are one of the most common varieties of quail, and are a domesticated breed, so are hardy and happy in captivity. They are easy to care for, easy to find a breeder to supply fertilized eggs for you, and do very well in a variety of climates. One of the other things that drew me to Coturnix Quail, was the variety of feather colors that they come in! Of course, I had to “collect them all” and so now we breed more than a dozen different colors. Who can resist!? We raise 2 different varieties of Coturnix Quail here at Sadie-Girl Farm… The Blue Ridge Jumbos, which as their name suggests, get a bit larger than the standard coturnix. Their eggs are also a bit larger, so it lends themself well to home cooks and bakers who want to use their eggs (and even meat) in their family meals. The other variety of Coturnix Quail that we raise is called Celadon Quail. Celadon Quail are a Coturnix Quail who happens to carry the recessive Celadon gene, which causes them to lay blue eggs. They are lovely! Always a conversation starter! And I say, if you are going to raise quail, you might as well raise gorgeous ones!
Another thing I love about the Coturnix, is that they lay eggs nearly year-round (300 or so eggs per year, per hen), and the eggs only take 18 days to hatch. After they hatch, they are the CUTEST little balls of fluff that dart around, cracking us up with their antics, from the very first day. We call it “Quail TV” around here, and we can just watch them for hours it seems! Coturnix Quail also will begin laying eggs at only 8 weeks old, in comparison to chickens who take 5-6 MONTHS to start laying! It is for these reasons that we chose Coturnix Quail to raise on our farm. They really are such a great fit for a small (or not so small) homestead.
Quail Egg incubators
Now before you obtain your eggs, you will need an incubator. There are about a million different ones, some much better and more user-friendly than the others. Let me tell you about the ones that we personally have used and have had a great experience with.
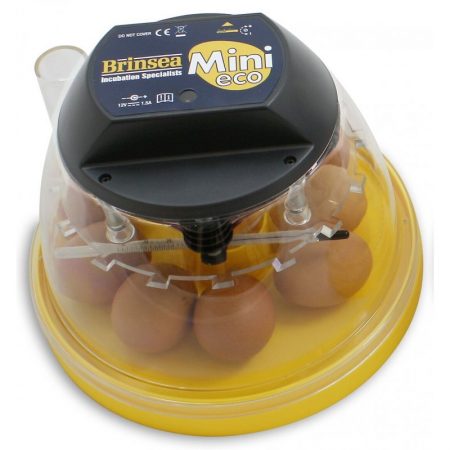
The smallest is the Brinsea Mini Advanced. You can find it here. It holds 7 chicken eggs or 12 quail eggs (you will need to get the quail egg rack for it here and fits nicely on a kitchen countertop. Brinsea is a really good brand of incubator. They make several different sizes so feel free to scale up if you want to do a larger hatch. I love the see-throughness (is that a word!?) so you can witness the miracle of life as the chicks begin to hatch. It is also fully digital so will tell you the humidity and temp readings and is easy to adjust. Plus it is small and cute so will not be an eyesore in your house.
Another favorite smaller incubator I like to recommend is the Nurture Rite 360. You can find it here. It fits 22 chicken eggs or 44 quail eggs by placing 2 quail eggs in each egg slot, and it works perfectly. They also now make a quail egg turner insert for this model which you can buy here, and it will fit 45 quail eggs. This one is also counter-top sized and completely see-through, and I love that you can add water to it as needed, from the outside, without having to open the incubator at all. This one is also fully digitized, though you do want to double check the temperature and humidity accuracy with another thermometer (we love this specific one), which is a good practice to do with any incubator, to make sure they are reading correctly and adjust your incubator temp as needed.
This next one is the incubator that we used our entire first year of hatching… the GQF Hovabator. This is a styrofoam table-top incubator. There are a lot of look-alikes, but none work as well as the hovabator, so make sure you get the real deal. You can find them here. This model holds up to 41 chicken eggs or up to 120 quail eggs if you get the quail egg turners. Make sure you get the automatic egg turners and save yourself your sanity of having to hand-turn the eggs 3+ times per day, every day, for 2 weeks. (All of the incubators I am listing here have automatic turners, this is not a coincidence). You will also get better hatch rates if you use an automatic turner, as they turn the eggs more often and more consistently than if you did it by hand. They sell quail turning racks specifically made for this incubator which you can find here. The Hovabator keeps the eggs in a vertical position, rather than a side-lying position, which is what the first 2 incubators do. This is slightly better for the eggs if you are getting them shipped to you, as the vertical alignment helps the air sacs in the eggs stabilize if they got shaken up on their postal journey. Though I have had great hatches using both versions of turners. This one is also fully digital, which you definitely want. Again, double check temperature and humidity readings by sticking in another thermometer to test it against (here is the one we use that tends to be very accurate). A few drawbacks to this incubator, is you have to play around with how many of the water troughs inside to fill, in order to get your desired humidity setting. A little experimentation before your eggs arrive, should show you what your specific climate needs in terms of number of troughs filled (more on that in a bit). The other thing I don’t love about it, is you have to open the incubator and sometimes move a few eggs aside, in order to fill the water container, not ideal, but totally doable.
Lastly, I want to mention the incubator we currently use for our hatching business (actually we have 3 of these in full production!). We use the GQF 1502 Sportsman. You can find them here. This is a cabinet incubator, so is MUCH bigger than the previously mentioned table-top ones. It works AMAZING and can hatch a golf ball I am pretty sure! However, it is quite an investment and is made for a larger scale hatching situation. It can hold more than 1500 quail eggs at a time, so is only necessary if you are wanting to really scale up your hatching. You can also incubate chicken and quail eggs at the same time in this one (as well as guinea hens, ducks, geese, or even emu if you wanted!). I recommend starting with one of the smaller ones until you get comfortable hatching, and then moving up to this one if this is really something you want to dive into. That being said, the Sportsman is the incubator of my dreams. It has automatic turning trays which can be adjusted with the push of a button. Super accurate temp and humidity readings which are also fully adjustable. A 3-gallon bucket sits on top and continually keeps the water container full, so I can go out of town for a week and not worry about topping off the water every day. And unlike some of the smaller incubators, it has very minimal hot and cold spots inside it (they all do, but these can affect hatch rates). The Sportsman really is a “set it and forget it” incubator. Like I said, we own 3 and I have found our perfect incubator for OUR situation (we hatch 100s of chicks each month).
You definitely don’t need to spend a ton to get a really good incubator that will hatch chicks for you. But it is true, especially with incubators, you do get what you pay for. You can find some cheap plastic incubators on ebay, but those will just give you a headache and you may only get 1-2 chicks (if any!) to hatch due to extreme temperature and humidity fluctuations, hot and cold spots, and I have heard of motors that just QUIT mid-hatch. Stick with a tried and true model and you will be able to really enjoy the hatching experience.
With whichever incubator you end up going with, make sure to read the instructions for THAT incubator carefully, and follow them. The manufacturers know what they are talking about. Each one is slightly different and has slightly different setup and user needs.
Quail hatching guide :
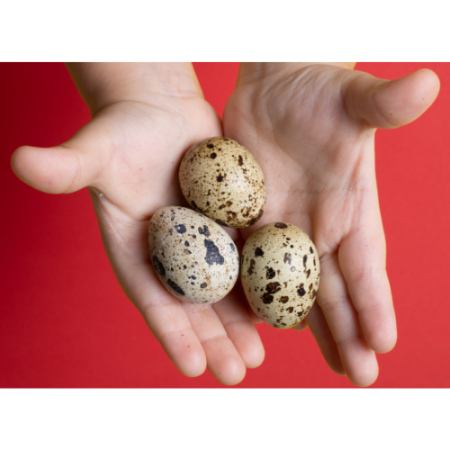
Now you have your incubator and you are ready to purchase your hatching eggs! We sell our hatching eggs and ship anywhere in the US (shameless plug!). You can purchase from our farm here, in our Online Farm Store. Or a simple google search should turn up several sources of Coturnix Quail breeders. Make sure they are certified to ship accross state lines if you cannot find one in your home state. Even better, you may be able to locate a breeder within driving distance to you!
Go ahead and order your eggs when you are ready. Remember that with shipped eggs and you being new to your individual incubator and hatching in general, you can count on an average of about 50% of the eggs hatching. This will go up as you get used to your incubator’s quirks and more familiar with the process, but we all start out as beginners as with any new skill. Here at our farm, I consider an 80% hatch rate, a good hatch. That is just nature’s way.
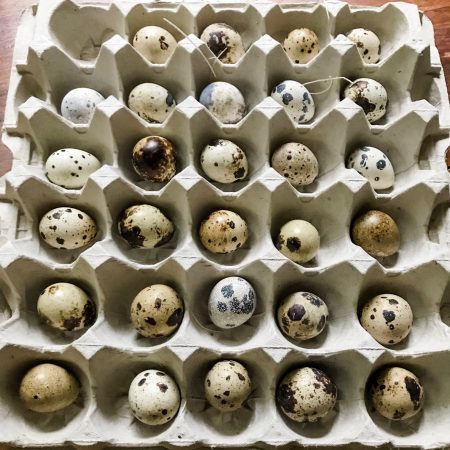
So order about twice as many eggs as you want baby chicks. A dozen is a great number to start with and is our most popular amount ordered (we actually send you 15 in case 1 or 2 get cracked in shipment… it is rare but does happen from time to time).
Correct Temperature for hatching quail eggs
Once your eggs arrive, turn on your incubator and fill it with the proper amount of water (the instructions for your incubator will tell you how to do this). This will let it heat up and come up to the proper temp and humidity BEFORE you set your eggs in. We set our incubators to 99.7 degrees Farenheit. Anywhere from 99.5-100 degrees is fine. Make sure to double check the temperature with a second thermometer placed inside the incubator. If it is off by a bit, you can adjust accordingly. Sometimes I get super neurotic with a new incubator and will stick 2 different thermometers inside to make sure they all “agree”. Here is ours.
correct humidity for hatching quail eggs
Humidity is really important for the success of hatching your eggs. We try to get our humidity around 40-50% for the first 15 days of incubation. Play around with the water, and the vent (some are adjustable) until you get close to this range. Each climate’s relative humidity varies, and it also varies based on the time of year. In the summer I need to add water to a small compartment of ours, whereas in the winter with the heater and/or woodstove on, I add much more water and close the vent to keep the moisture in. Get comfortable with yours by playing around with it a bit. If the humidity is reading way to low, you can add a damp sponge inside the incubator (we sit one right in the water tray) or put a humidifier near the incubator. If it is much to high, you may not need to add any water at all for the first 15 days to acheive these settings. Find what works for you.
If your eggs were shipped to you, go ahead and gently remove them from the foam shippers (or whatever your breeder packed them in), and keep them with the pointed side down toward the ground (fat end up). You can place them in a regular chicken egg carton to hold them safely. Let them sit on the counter for 24 hours before you set them in the incubator. This is important for helping stabilize any air cells that may have been jostled during shipping. During this time, your incubator is on and preheating and you are making sure you get the humidity around the correct range. Make sure your incubator is in a room that holds a realatively even temperature, free of drafts and out of direct sunlight. Big temperature swings can have a negative effect on the incubating eggs.
If you picked up your eggs directly from your breeder, you can skip the 24 hour sitting period, and instead put them diretly into your preheated incubator. If you have an automatic turning tray which holds the eggs vertically (such as the Hovabator or the Sportsman), make sure to put them in the turners fat end up. If you have side-lying turners, don’t worry about how you place them in.
For the first 15 days keep an eye on the humidity and add water as needed to the water tray. The incubator should take care of the rest. On day 16 we will enter “Lockdown”. For lockdown, you will want to take the eggs out of the turning trays and remove the turners from your incubator (if your model allows this). I like to gently take the eggs out at this time and place them carefully in an egg carton while I remove the turners and put a piece of rubber shelf liner (such as this one here) onto the bottom of the incubator. Don’t worry, this brief time out of the incubator will not harm your eggs. The rubber liner will give the chicks a good grip for their footing once they hatch, which helps them to move around safely and not develop splay leg. Once the liner is in the bottom of the incubator, gently place your eggs back in. To reduce the time your eggs are out of the incubator, you could even precut your liner before you start the incubation process so it is ready to go on Lockdown day.
For Lockdown, we need to raise the humidity of the incubator to around 70-80%. Each incuabator is different but the instructions should tell you how to do this. Usually it involves filling a second tray with water to increase the amount in the incubator. You can also close the vent slightly (though do not close it all the way) or add a sponge or 2 into the water trays. From this point on DO NOT OPEN YOUR INCUBATOR until the hatch is over. We want that humidity to really build up in there to soften the egg shells and help the chicks hatch out. If you open the incubator during Lockdown, you will let all that good humidity escape, and if a chick was starting to pip out of it’s egg, it would get “shrink wrapped” by the membrane suddenly losing it’s moisture as all that humid air rushes out and a bunch of dry air rushes in.
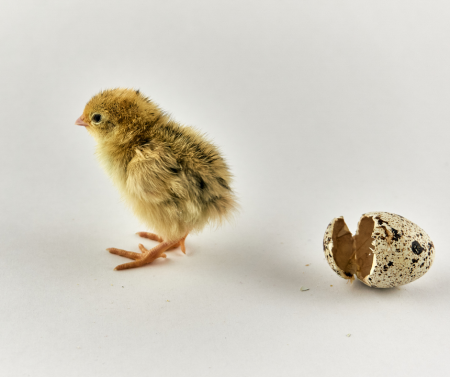
Your chicks will begin to hatch on day 18 or 19. Sometimes they will hatch a day or two early or a day or two late, if your incubator temp was off a bit. Don’t worry, and just adjust it for next time. It can take a chick 24 hours to fully hatch out of it’s egg from the time of it’s first pip in the shell. Patience! Do not interfere or try to “help” a chick out of the egg, unless it is one of the last ones to hatch. The chicks really need to develop that leg and hip strength from pushing themselves out of the shell, and helping them could cause them to have leg/hip issues and have to be humanely put down. Nature will only allow those chicks that are strong and healthy and perfectly developed to hatch out. It is ok if some do not. Nature knows best.
Allow the chicks to remain in the incubator 12-24 hours after they hatch so they can dry fully off and for the late hatchers to have a chance to hatch out. 24 hours after the first chick hatches out, you can remove the dry fluffy ones and put them in your set up brooder (more on that here), and leave the ones that are still wet or still hatching, in the incubator until they are dry and running around.
Congratulations! You (hopefully!) have hatched a few chicks! Remember it is a skill, and you will get better at it each time you try and as you learn the quirks of your unique incubator (they ALL have quirks). For more info on how to rear your day-old quail chicks successfully, you can check out our blog post, called “Caring for New Chicks”. I hope you have enjoyed the experience of your first hatch and beware!… hatching can be addicting! Please reach out to us here at the farm anytime you have any questions. We love chatting about quail! We can be reached at SadieGirlFarm@gmail.com
And if you are ready to jump right in and order some hatching eggs (or already hatched chicks) you can hop over to our Online Farm Store and get your order in!
Until next time,
Happy Hatching!
-Julie
